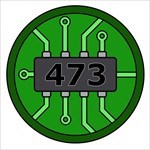
Darwin473 Posted October 6, 2020 Posted October 6, 2020 Firstly, apologies for doing the whole "yay, first TB" newbie post - but it's so exciting to get ready to send the first one out into the world! Secondly, I wanted to share what I did in case it helps someone else with their TB's. This is what I'm sending out (with front and back on one image): It's a LEGO tyre (I have no idea what set it's from, it was floating around in the bottom of one of my drawers), with a hole drilled through the tyre face for the chain, and a home-made aluminium Travel Bug copy. So the original TB stays in my drawer at home, in case (when?) this one goes missing. Personally, I think I had more fun making the aluminium copy than anything else. I made the aluminum copy by using the toner to packing tape method for getting my printed design onto something transparent, used photoresist dry film to create a mask on the aluminium, and then used salt water and electricity to etch the aluminium (so no nasty chemicals or acids to deal with). Overall, minimal cost as I already had the printer and packing tape, and the bits I used (including the power supply) to etch the aluminium I bought from a thrift store. The biggest cost (and delay - I ordered it back in July but it took over two months to arrive) was the dry film - at a bank breaking total of $9 including postage for 1m (3ft). The idea is that the TB is interesting enough that people go "hey, neat" but not so interesting that they put it in their pocket. The copy is so that if it does go missing, I can re-launch it again. Plus by making my own tag, I could put my own text on it including the goal / mission for it. The bulk of the text on the back is what I've seen on other TB's. Sure, I could have used laminated paper, or just paid a few dollars for an engraver to laser engrave some metal - but where's the fun in doing it the easy way? 3 1 Quote
+outdoorsoccer Posted October 6, 2020 Posted October 6, 2020 2 hours ago, Unit473L said: Firstly, apologies for doing the whole "yay, first TB" newbie post - but it's so exciting to get ready to send the first one out into the world! Secondly, I wanted to share what I did in case it helps someone else with their TB's. This is what I'm sending out (with front and back on one image): It's a LEGO tyre (I have no idea what set it's from, it was floating around in the bottom of one of my drawers), with a hole drilled through the tyre face for the chain, and a home-made aluminium Travel Bug copy. So the original TB stays in my drawer at home, in case (when?) this one goes missing. Personally, I think I had more fun making the aluminium copy than anything else. I made the aluminum copy by using the toner to packing tape method for getting my printed design onto something transparent, used photoresist dry film to create a mask on the aluminium, and then used salt water and electricity to etch the aluminium (so no nasty chemicals or acids to deal with). Overall, minimal cost as I already had the printer and packing tape, and the bits I used (including the power supply) to etch the aluminium I bought from a thrift store. The biggest cost (and delay - I ordered it back in July but it took over two months to arrive) was the dry film - at a bank breaking total of $9 including postage for 1m (3ft). The idea is that the TB is interesting enough that people go "hey, neat" but not so interesting that they put it in their pocket. The copy is so that if it does go missing, I can re-launch it again. Plus by making my own tag, I could put my own text on it including the goal / mission for it. The bulk of the text on the back is what I've seen on other TB's. Sure, I could have used laminated paper, or just paid a few dollars for an engraver to laser engrave some metal - but where's the fun in doing it the easy way? Great looking TB! I am not sure what type of weather you have in Australia, but from my experience (here in the US), the small chain that is sent with the Tags don’t usually fair well. There have been a few times I have found TBs in a wet cache and the chain has rusted off, which might lead to the TB tag getting separated from its attachment. I have switched to using zip ties to attach my tag to the traveler and mission statement and placing them in small freezer bags. good luck. Hope your TB has some great adventures during its journey.. Which reminds me... I need to send out my next round of TBs....lol. take care, ODS Quote
+cerberus1 Posted October 6, 2020 Posted October 6, 2020 (edited) Looks cool. I'm sure you realize "Don't Keep Me" have been on Travel Bug tags for a long time... We don't see a "rusting" issue when most we know pitch the original chains, and replace 'em with stainless mil. dog tag chain. I've had the same SS chain on my neck since the early seventies. Edited October 6, 2020 by cerberus1 edittt Quote
Darwin473 Posted October 6, 2020 Author Posted October 6, 2020 9 hours ago, outdoorsoccer said: ...type of weather you have in Australia... We have everything, from dessert to rainforest to even snow (in a few, small places for short times of the year). I like to put TB's in ziplock bags to help them last longer when I find them, though it hadn't occurred to me that the default chains they come with would be cheapies and not stainless steel. Thanks for pointing that out! 6 hours ago, cerberus1 said: I'm sure you realize "Don't Keep Me" have been on Travel Bug tags for a long time... Yes, that's where I got the text from. Not that it stops people any more than roadside speed limit signs stop people speeding. But at least it's on there. On the plus side, nobody has pointed out any spelling mistakes (yet) so my inner editor must have done an okay job! 1 Quote
+Max and 99 Posted October 6, 2020 Posted October 6, 2020 (edited) 6 minutes ago, Unit473L said: nobody has pointed out any spelling mistakes (yet) so Just for next time: First of my TB. ? Edited October 6, 2020 by Max and 99 Quote
+kunarion Posted October 6, 2020 Posted October 6, 2020 (edited) 37 minutes ago, Unit473L said: We have everything, from dessert to rainforest to even snow (in a few, small places for short times of the year). I like to put TB's in ziplock bags to help them last longer when I find them, though it hadn't occurred to me that the default chains they come with would be cheapies and not stainless steel. I like the etching idea! That's a pretty cool way to do it. I used the factory ball chain on my first TBs, but those don't seem to endure. Lately, I secure them well, and maybe add the chain as an accessory. Sometimes I just use split-ring clips, but most often, I use a 6-inch cable keychain (pictured) that has a threaded connector which I seal with Locktite. I bought a pack of 100 on ebay. I've also tried various craft and jewelry chains, which can be found cheap in thrift stores. They're easy to assemble into a small continuous loop (no clasp). Edited October 6, 2020 by kunarion Quote
+lee737 Posted October 7, 2020 Posted October 7, 2020 20 hours ago, Unit473L said: I made the aluminum copy by using the toner to packing tape method for getting my printed design onto something transparent, used photoresist dry film to create a mask on the aluminium, and then used salt water and electricity to etch the aluminium (so no nasty chemicals or acids to deal with). Genius! I am going to copy this as soon as I get home...... With the ball chains - I put a drop of superglue in the clasp, and seal it with heatshrink to stop them coming undone, so far we have some going strong for 3+ years like that.... Quote
Darwin473 Posted October 7, 2020 Author Posted October 7, 2020 It took me a few goes to get the process down. It has the advantage of being really cheap, it has the disadvantage of being a bit time consuming. If I had the option, I wanted to buy one of those cheap laser engravers online. They're useless on aluminium but if you give the aluminium a thin coat of black paint, then a low power laser engraver can totally burn off the paint - then use the salt etch method to do the actual engraving. Save several steps that way. If you have a go and have any questions, feel free to ask here or message me directly. At the moment it takes me the better part of the day to do one tag (both sides) but that's also doing other things like housework in between steps. The power supply I use is a 5VDC 2.5A and it's probably a bit too aggressive. A 5V, 1A power supply should be fine, and cheap enough if you need to go buy a new one. As for the toner to tape transfer method, I've used that to make a bunch of stickers for things around the house plus for some of my signature items. Quote
+Rexlady Posted January 6, 2021 Posted January 6, 2021 On 10/7/2020 at 4:29 AM, Unit473L said: It took me a few goes to get the process down. It has the advantage of being really cheap, it has the disadvantage of being a bit time consuming. If I had the option, I wanted to buy one of those cheap laser engravers online. They're useless on aluminium but if you give the aluminium a thin coat of black paint, then a low power laser engraver can totally burn off the paint - then use the salt etch method to do the actual engraving. Save several steps that way. If you have a go and have any questions, feel free to ask here or message me directly. At the moment it takes me the better part of the day to do one tag (both sides) but that's also doing other things like housework in between steps. The power supply I use is a 5VDC 2.5A and it's probably a bit too aggressive. A 5V, 1A power supply should be fine, and cheap enough if you need to go buy a new one. As for the toner to tape transfer method, I've used that to make a bunch of stickers for things around the house plus for some of my signature items. Has anyone tried a dremel to engrave stuff? Quote
Darwin473 Posted January 6, 2021 Author Posted January 6, 2021 If you have a bit of metal, a steady hand and a dremel then it should be relatively straightforward to make up a tag. The reason I went for my method was because I wanted to add a fair bit of small writing onto my tag. And with my terrible handwriting with a pen, I knew it wouldn't work with a dremel! For my latest couple of TB's I just used a laminated bit of paper. If the tag was just going to have "Track at geocaching.com" with the tracking code on one side, and maybe the username or name of TB on the other side then using a dremel should work quite well. 1 Quote
+lee737 Posted January 6, 2021 Posted January 6, 2021 22 minutes ago, Unit473L said: If the tag was just going to have "Track at geocaching.com" with the tracking code on one side, and maybe the username or name of TB on the other side then using a dremel should work quite well. You must have a steadier hand than I do.... I have exceptionally neat handwriting, but my 'dremeling' (just trying to engrave the code alone) is very ordinary... I know this as we engraved some blank copy tags with our 'Mary Hyde' trackable codes, had to toss a couple due to illegibility. Both these TBs seem to be missing after a cache or three.... Quote
Darwin473 Posted January 8, 2021 Author Posted January 8, 2021 If you're looking at just putting a bit of metal with the code, or the code and a small amount of text such as the TB name then you could look into letter stamps for metal which come in a variety of sizes and styles. Many hardware stores carry the heavy duty ones that will work on steel, some craft stores carry light duty (read: cheaper) ones that will work on aluminium or thin stainless steel. If you get friendly with some local engineering or engraving place, you might be able to talk them into laser engraving some metal tags for you on some scrap metal for only a few dollars. I haven't had any TB's go missing (yet), not sure how much a difference it makes that I've only sent out proxies. But I've only sent out a few and none have been out long. 1 Quote

Recommended Posts
Join the conversation
You can post now and register later. If you have an account, sign in now to post with your account.
Note: Your post will require moderator approval before it will be visible.